
CNC to 3Dprinter conversion | from CNC to 3Dprinter
CREATE A 3D PRINTER WITH YOUR MACH3 CNC (mil / router)
COMPLETE THE CONVERSION IN 6 SIMPLE STEPS:
and print any 3D object from a 3D drawing (step or stl).
Once the conversion is completed, 3D printing is obtained simply by uploading to the printer, the 3D drawing modified by the slicer .
INTRODUCTION
To proceed with the CNC to 3Dprinter conversion, first of all remember that the CNCs based on the Mach3 software controller use the G-code language to move the axes automatically managing the stepper motors; these are the motors connected through the LPT1 to a PC with a Windows operating system. Also 3D printers use the same G-code language, but with some instructions dedicated specifically to the temperatures of the devices connected to the printer. The simple installation of the Extruder & Bed Controller (EBC), device that we are presenting, and of the relative software utility, allows to transform the CNC into a 3D printer. Let’s see how:
 |
 |
INSTALLATION
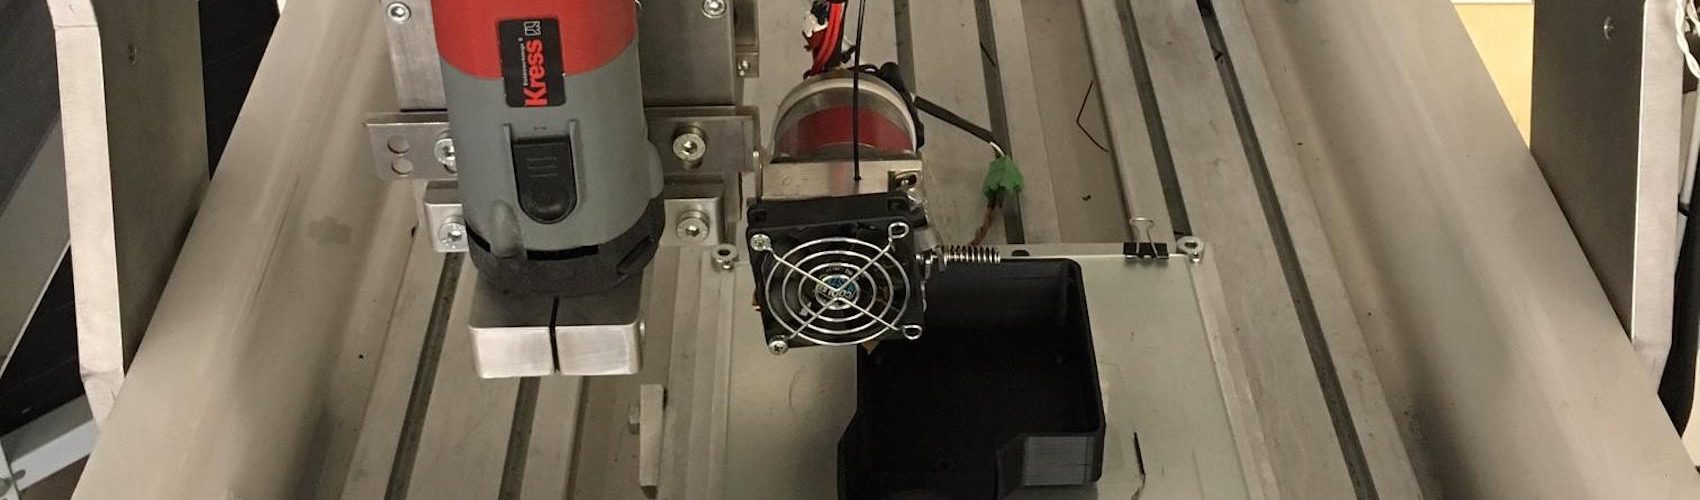
 1. Mounting of print head and heated bed:
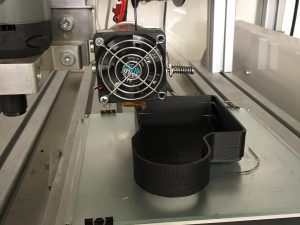 1.
1. on the web there are several models of extruders similar to each other, you can use indifferently with the EBC interface; in the case described here, we have chosen an MK5 head type. The only requirements for the correct driving of the print head are: 24Vdc power supply and K type temocouple.
As for the heated bed, the only requirement is the supply voltage of 24Vdc.
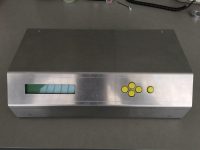
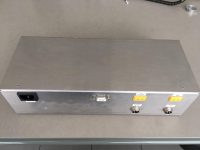
2. Extruder & Bed Controller
 2. Extruder & Bed Controller
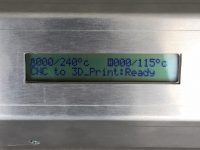
The EBC interface directly controls the temperature of the print head and the heated bed, continuously monitoring its progress.
As a standard 3D printer, it is able to set the different temperatures required during the different printing phases, thanks to the connection with Mach3 through a simple RS232 port.
.
3. Creating a Mach3 printer setting
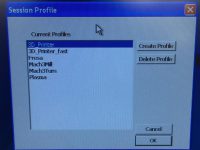 3.
3. Following the activation of the fourth axis with which the stepper motor of the extruder is driven, you can simply duplicate the Mach3’s milling setup.xml and rename it in 3D_Printer.xml. Then proceed with the calibration of the correct ratio step/mm, to obtain the exact quantity of plastic filament necessary for the print head based with the speed of the 3 main axes (X, Y, Z).
.
4. Installing the EBC-uty software utility (supplied with the EBC interface)
This setup then automatically installs all the software parts used by Mach3 to talk with Extruder & Bed Controller; the installation also creates (within the Macros directory) a new folder called 3D_Printer, which contains all the necessary macros. The installed software is therefore able to interpret the G-code generated by the slicer, routing the instructions for the fourth axis (filament motor) and those intended for the head temperature and heated bed (EBC).
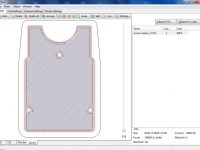
5. Installing the slicer software
 5. Installing the slicer software
Slicer3R allows to generate the Mach3 G-code directly; this software, absolutely complete and intuitive in use, also becomes an integral part of the system. Although other packages (eg Skeiforge, Replicator, Ultimaker Cura) can be found on the web, the availability of Slicer3R for the most common operating systems – Windows / OSX / Linux, the freeware source and the declared compatibility with Mach3 make it the tool that we suggest.
6. Printing any object
Your CNC has become a professional 3D printer.
Print speed depends only on the features of your CNC, the faster your XYZ movements are, the faster your prints will be.
It is worth remembering that, if the performance speed of a small and light 3D printer is hardly reached, it is equally certain that the final result will not be any less: on the contrary, the CNCs typically have substantially better movements and backslashes than those small “toys”; all this allows precise definitions even in small printed details.
NOTES:
Through the macros created by us, the G-code specific commands for the RepRap / Prusa type 3D printers (today the most common on the market), are managed via RS232. A specific driver (also installed by EBC-uty) takes care of transferring to the EBC interface all the G-codes concerning temperatures and fan speeds. The EBC interface then interprets the aforementioned commands, generating the electrical signals and supplying the necessary power for the heaters; lastly, thanks to a smart PID, the nose and heated bed temperatures are instantly updated and kept under constant control, ensuring an optimal print quality.
TECHNICAL DATA
IMPLEMENTED MACROS:
M104 Pxxx Set1 extruder target temp to xxx
M104 Sxxx Set2 extruder target temp to xxx
M109 Sxxx Set3 extruder target temp to xxx active PID and send R0 xxx
M105 Read current temp and send R0 xxx
M106 Pxxx Fan ON/OFF ON xxx>127 OFF xxx<127
M140 Pxxx Set bed target temp to xxx
M190 Pxxx Set bed target temp to xxx active PID and send R1 xxx
RS232 IMPLEMENTATED COMMANDS
Once the CNC to 3Dprinter conversion is completed, with these commands, you can send using a simple HyperTerminal software, the relative modifications are obtained. Serial setting: baud 15200.8, n, 1.
Ex. “0” followed by “CR” generates the switching off of the currently selected PID. Below is the list of available commands:
| 0 1 +/- p+/- i+/- d+/- S M104 Pxxx M104 Sxxx M109 Sxxx M105 M106 Pxxx M140 Pxxx M190 Pxxx |
PID out ON/OFF. Reset. Add1 +5/-5°c to target temp. Add2 +20/-20 to KP. Add3 +20/-20 to KI. Add4 +20/-20 to KD. ShowPid extruder/bed. Set1 extruder target temp to xxx Set2 extruder target temp to xxx Set3 extruder target temp to xxx active PID and send R0 xxx Read current temp and send R0 xxx Fan ON/OFF ON xxx>127 OFF xxx<127 Set bed target temp to xxx Set bed target temp to xxx active PID and send R1 xxx |
Here you can download the RepRap GCode Cheat Sheet: the instruction set for common RepRap 3D printers.
Trademarks are the property of their respective manufacturers.